These type of issues are more prevalent on dolls from 2006 and earlier and are usually seen in heavier dolls or those that do a lot of camera work. The hip doesn't actually break, the sleeve that holds the steel shaft separates from the socket when the epoxy lets go of its hold. Later model hips use a different polymer sleeve that bonds better.
Whenever you suspect a hip problem ALWAYS contact Abyss in the first instance. Their advice and backup will be invaluable. To help dispel the mystery and prove that this repair can be done by the RealOwner I have added the following.
Treat this like the operation that it is. Wash your hands, trim nails and make sure that all you need is to hand. I use as a minimum - 2 dozen or more pairs of latex gloves, sharp knife, scalpel, 2 x 7/16 spanners, acetone, cotton balls, phillips no.2 screwdriver, silicone adhesive and towel. Keep the cut area as clean as possible and change your gloves whenever they are contaminated by dust, sweat or the black that forms around internal metal parts. Set up somewhere the doll does not have to be moved for several days - yes it will take this long.
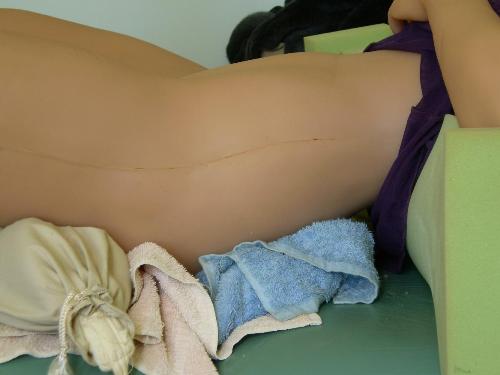
1. Clean the area of the cut thoroughly
A good wash with acetone will clean the area of any dust
which may contaminate the cut area and could cause poor
gluing later on.
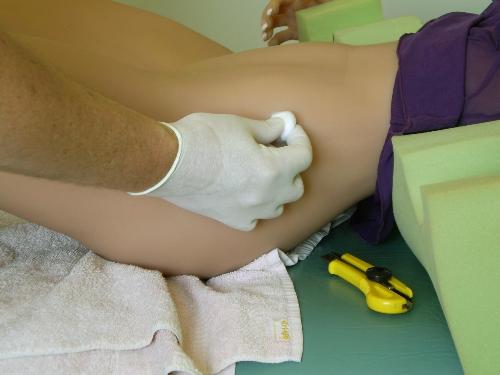
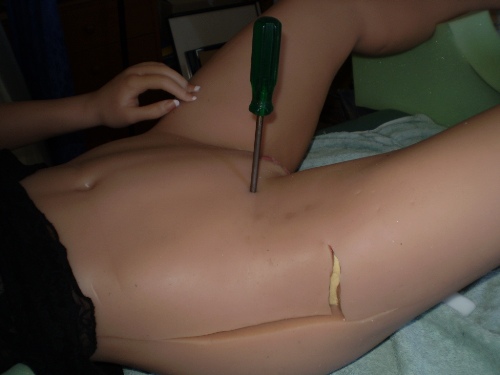
2. Locate the approximate position of the hip joint
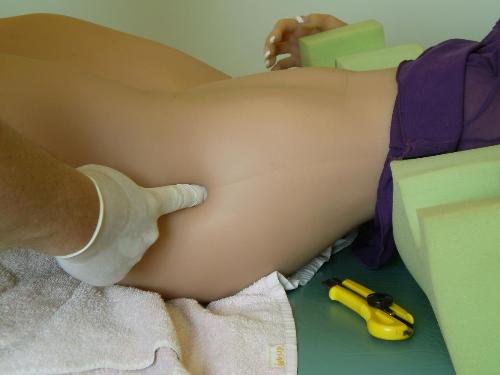
On a B10 this is level with the mold seam line, but may not be on other dolls. To reach the hip with a minimum of cutting
will mean staying horizontal during the cutting process. The tendancy is to angle up which will miss the hip joint at the pelvis.
3. Know how far to cut
 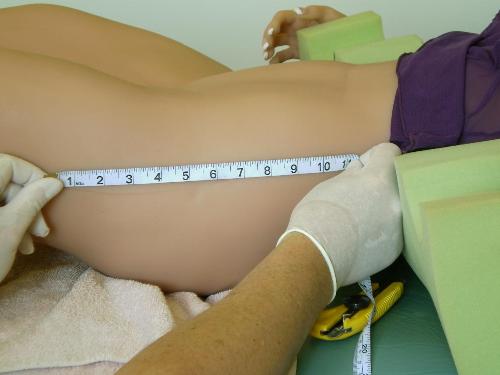
The cut on Zara extended 11 inches from the level of the
belly button to almost mid thigh. This length is
necessary on a B10 because of the depth needed. A long
cut will not cause tears like a short cut will.
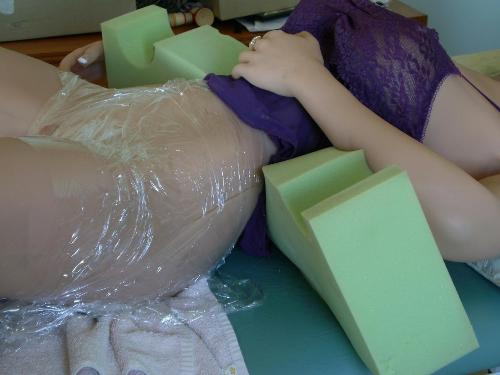
4. Start cutting

Keep a steady hand and progress slowly. A straight, clean cut will make closing up later
much easier.
5. Don't cut too shallow during the first cut
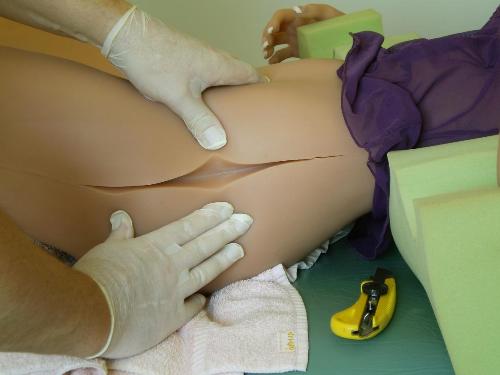
Try to get a depth of 20 - 30mm or 1 inch in a single cut.
Make it as straight as possible following the mold seam line.
6. Exposing the top of the leg
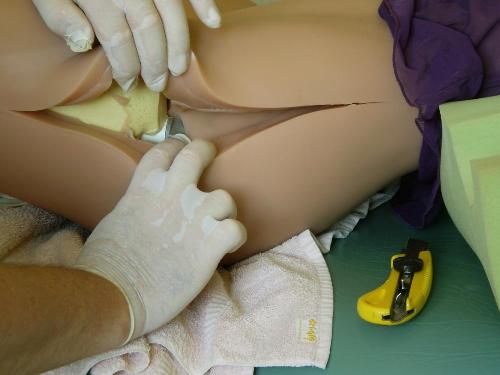
The yellow section is the foam core that makes up the bulk of the thigh.
The core extends high up the leg of a B10. The hip is further inside the
body and a lot of silicone is still to be cut through. A B10 has a big butt.
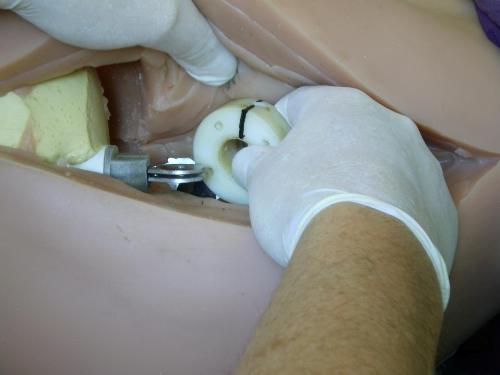
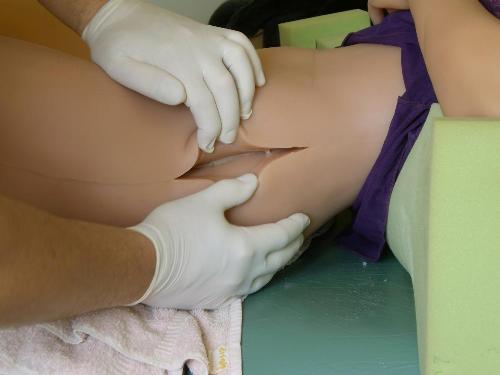
7. Exposing the hip joint
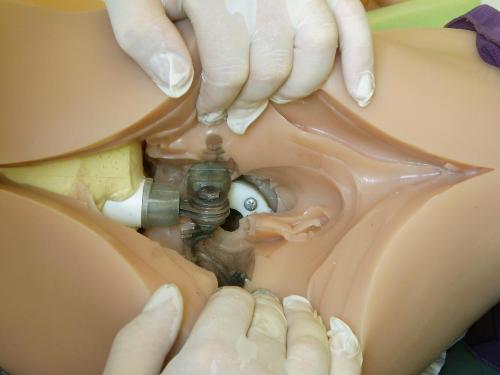
This shows the total dislocation of the joint.
The shaft had pulled completely out of the socket
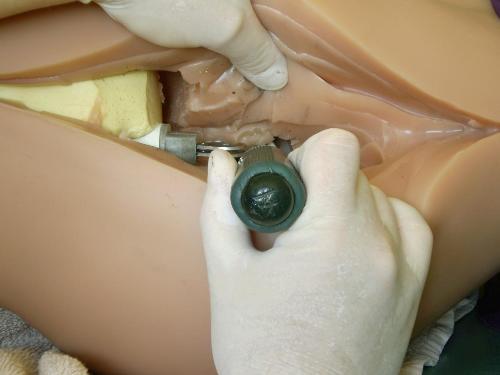
8. Remove the pivot bolt
This bolt joins the top of the leg to the hip joint.The bent spanner is useful to tighten Zara's lower neck when it comes loose. I've had to do this twice.
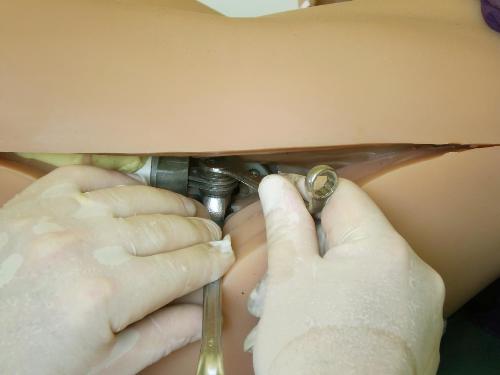
9. Remove the hip shaft
Try not to transfer any black onto the cut areas
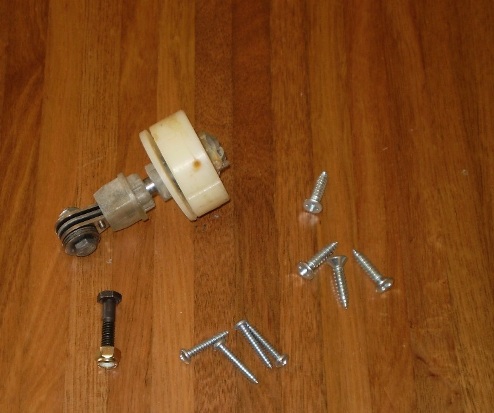
10. Remove self tapping screws
The self tappers hold the hip socket to the steel pelvis. This really needs 2 sets of hands but can be done alone.
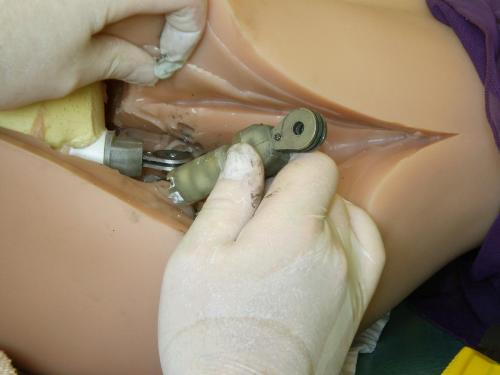
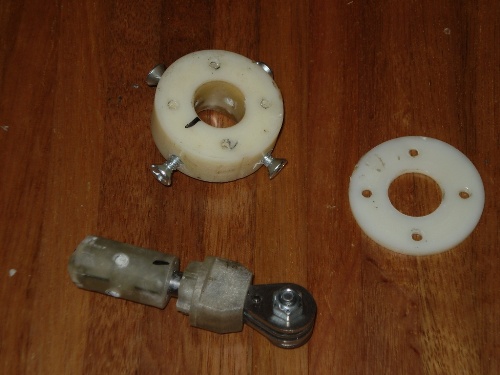
11. Remove socket
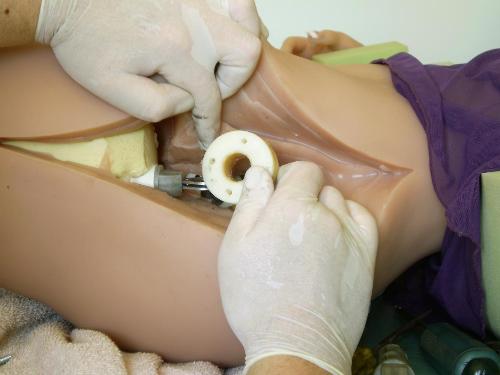
The socket is two nylon discs, a thin one on the outside of the joint and a fat one on the inside behind the steel pelvis. These are normally glued to the hip shaft.
12. Exposing the steel pelvis
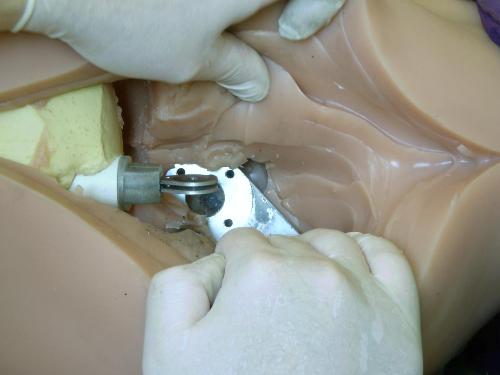
Patience is needed to remove all parts and clean up the area
13. The hip joint in pieces
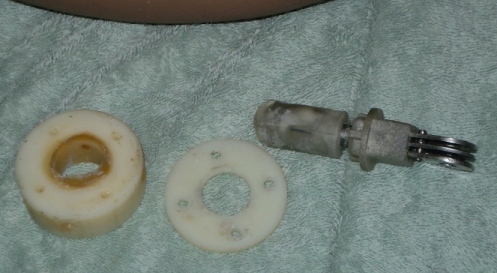
The hip joint removed. The hip pivots on a steel shaft that is embedded within the grey plastic sleeve. It is tight and can’t be turned by hand.
14. Modification
Zara’s hips were modified by drilling out the glue holes and using hardened tech screws instead. New hip joints from Abyss are not expensive.
15. Screws vs glue
The screws engaged with 3mm deep holes in the shaft sleeve once assembled. If using screws this is important otherwise the sleeve may slide out of the socket.
16.

"You pulled this out of my ass?"
17. Reassembly
Once the joint is back in place test the leg for range of movement to make sure it actually works and that the bolt is not too loose or too tight. Mark parts so that they are easier to assemble. Clean thoroughly removing all crumb and black from the cut.
18. Reassembling a screwed joint
This joint can only be assembled in place which means making a small but deep incision so that a screwdriver can reach the joint. Rotate ¼ turn after each screw is secured and make sure that the screws do engage in the predrilled holes in the sleeve. This photo shows the RH hip.
19. Position for closing the cut.

Once the joint is back in place position the leg so that the cut closes up on its own with no gaps. It takes time to get the position right.
20. Fully closed cut.
The cut should be invisible from a short distance. Doing this means not having to use staples to hold the cut closed. Packing in strategic places can help put pressure on the cut to keep it closed.
21. Cover between stages.
Its important to keep dirt out of the cut once it has been cleaned
22. Glue in stages.
A deep cut like this should be glued in stages with 24 hours cure time between stages.
The initial glue stage closed the cut to within about 40mm or 1.5 inches in preparation for the second and third stages.
23. Final glue with tinned and coloured glue.
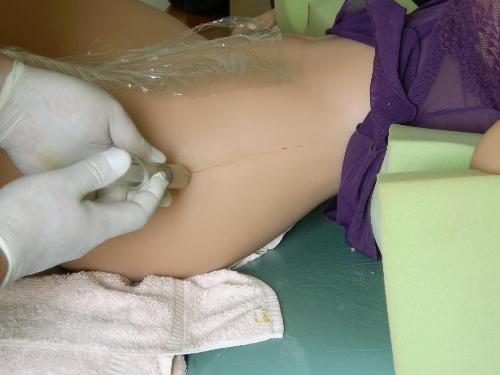
Third stage glue was using a syringe to squeeze glue into the cut which had been thinned and coloured. Then cover and leave to cure for 24 hours. The final stage may also be a thin layer of 2-part coloured silicone from Abyss. This may be necessary anyway to cover any scarring.
24. Let her rest.

Treat her gently for a couple of days afterwards. Nothing strenuous! You will want to make sure that everything will stay in place and that the glued cut will not split.


Comments
Lucky Girl
Dear Zara,
You are a lucky girl to have such a clever man look after you. Absolutely brilliant.
But I hope that never happens to me.
Hug and a Kiss
Tash
Ouch!
G'day everyone,...
I get a funny feeling in my tummy when I see a doll with a 'Boo Boo'...
Thankfully Zara is in good hands,...
I see the post op care is going well!
Playtime.
Playing with Dolls is a Joy!
WARNING: The Dolls are starting to play Back!
I think Zara's got 2 new
I think Zara's got 2 new hip's joints since that repair, which don't need anymore to pierce the stomach to screw the bolts :O
Anyway, that tutorial is very helpfull in understanding the inside of the hip ;)